Resources · Guide
Easy Books is designed to be set up by the owner, without a consultant. The steps are simple, but the order matters, and doing them out of order is the most common cause of a frustrating first week. Here is the order, with the manual article for each step.
On this page
1. Choose your server and name your computers
3. Install Easy Books on the server
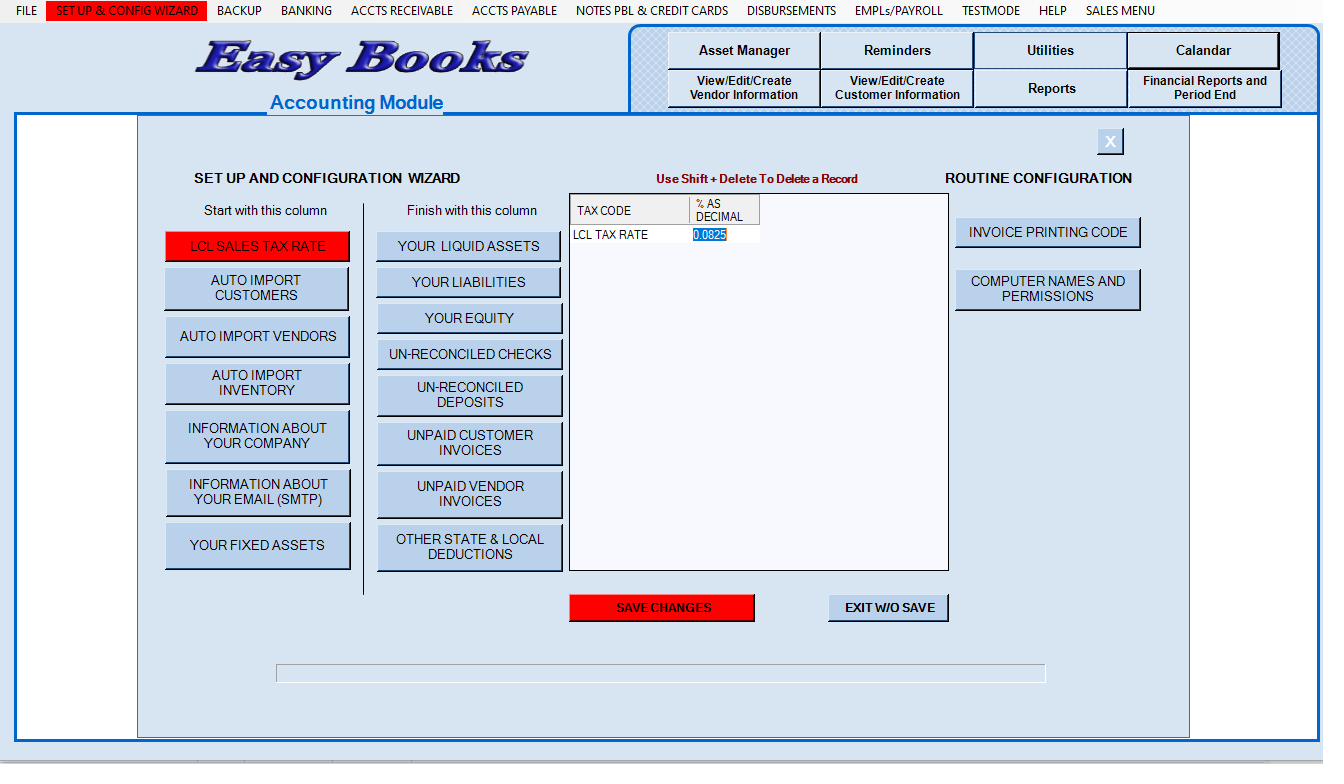
4. Run the Setup and Configuration Wizard
5. Tell each computer what it's allowed to do
Request the manualPick one computer to act as the server. It can be an ordinary Windows PC — ideally the newest one you have, with a solid-state drive. It will hold the database and the program, and the other computers will reach them across your office network. It can still be used as a workstation.
Rename that computer SERVER, in capital letters, before you install anything; the installer looks for that exact name. Give every other computer a name that says where it is or what it does — OFFICE1, SALES1, COUNTER2 — and write the names down. You'll need them later. (Articles 2.01 and 2.02.)
A peer-to-peer network is all you need: a gigabit Ethernet switch, which costs about $25, and a cable to each computer and network printer. On each machine you turn on network discovery and file sharing, as the manual describes click by click for both Windows 10 and Windows 11. (Article 2.01.)
Then, on every other computer, create a desktop shortcut to LaunchEasyBooks.exe on the server. That's all a remote computer needs to run Easy Books.
Download and install on the server first. Restart the server as soon as the download finishes. If no database exists yet, a blank one is created for you; if one does exist, it's left untouched and only the program is updated. (Article 2.03.)
Everything in this step is done on the server itself. The Wizard's buttons are in the order you should use them: your local sales tax rate first, then customers, vendors, items, and your opening balances. If you have a handful of customers, you can type them in. If you have hundreds, the Wizard imports them from a spreadsheet. (Article 2.04, and our guide to moving from QuickBooks.)
Learn SmartDate before you start — it saves real time. Type 0321 and press Enter, and you get March 21st of the current year.
In Setup and Configuration, under Computer Names and Permissions, assign each computer either the Sales Module or the Accounting Module. A counter computer can take orders and print invoices all day without being able to open payroll or the financial statements. (Article 2.04.)
Before you post anything real, click Test Mode. The screen turns red so you can't forget where you are. Run a pretend week: an estimate, a sales order, a delivery received, a customer payment, a check run. Make every mistake you're worried about. Then leave Test Mode and your real books are exactly as you left them. (Article 3.02.)
Before you go live, set up backups to a thumb drive, and make it a habit. The manual covers it in a few minutes. (Article 11.01.)
Choose a quiet moment — the start of a month, after payroll has been processed and vendor statements paid — and begin. From then on, if you're ever unsure how to do something, look it up in the Task Map: it lists more than 175 tasks, and each one tells you which window to use and where to read about it.
Request the manual
We will send you the complete Easy Books User Manual and the Task Map, free and with no obligation. Read them, compare them against whatever you are using now, and judge for yourself whether this is simpler. It takes under a minute to ask.
